Week-14
Preparing for prototype-1
Fixing issues and completing experiments
As I had to put my experiments in the catalogue of making the first thing I had to do was finish the LED experiment and to enable full screen on the p5js experiments. Struggle - I forgot what wire went where for the LED experiment and for the p5js experiment, the full screen would start to interfere with the interactivity. Later, Andreas helped me fix it.
I talked to Andreas about how I have been panicking lately. I was afraid of failing or my outcomes not turning out as great as I think them to be. But after consulting with him I felt better and a bit more motivated to just focus on the process. He helped me perceive this as an opportunity to enhance time-management skills.
Finishing the LED experiment
Frankly this doesn't look that great, and it didn't turn out to be as immersive as I thought it may be. Or maybe it needs more layers and better setting.
Enabling fullscreen in p5js experiment
Exploring with servo motor
To execute my p5js axperiment with Arduino, I first decided to work with servo motors. During my consultation with Jake during week-12, I shared that I was imagining a string able to controll a video - When I drag the string a building illustrated in the laptop falls apart and as I relase it, it gets dragged back and the building resets to norma;. Jake suggested that a servo motor could help me do that. Only I didn't know how to use them so I first just ran one of the basic example sketches from the Arduino IDE code.
It wouldn't work properly. First I thought something wrong with the code or my laptop but later Andreas helped me and it took a while until we figured that it is because I was using a duplicate Arduino UNO board and it doesn't give enough power to the servo motor that's why it wasn't working. So first I have to buy an original UNO board.
Weekly Consultations
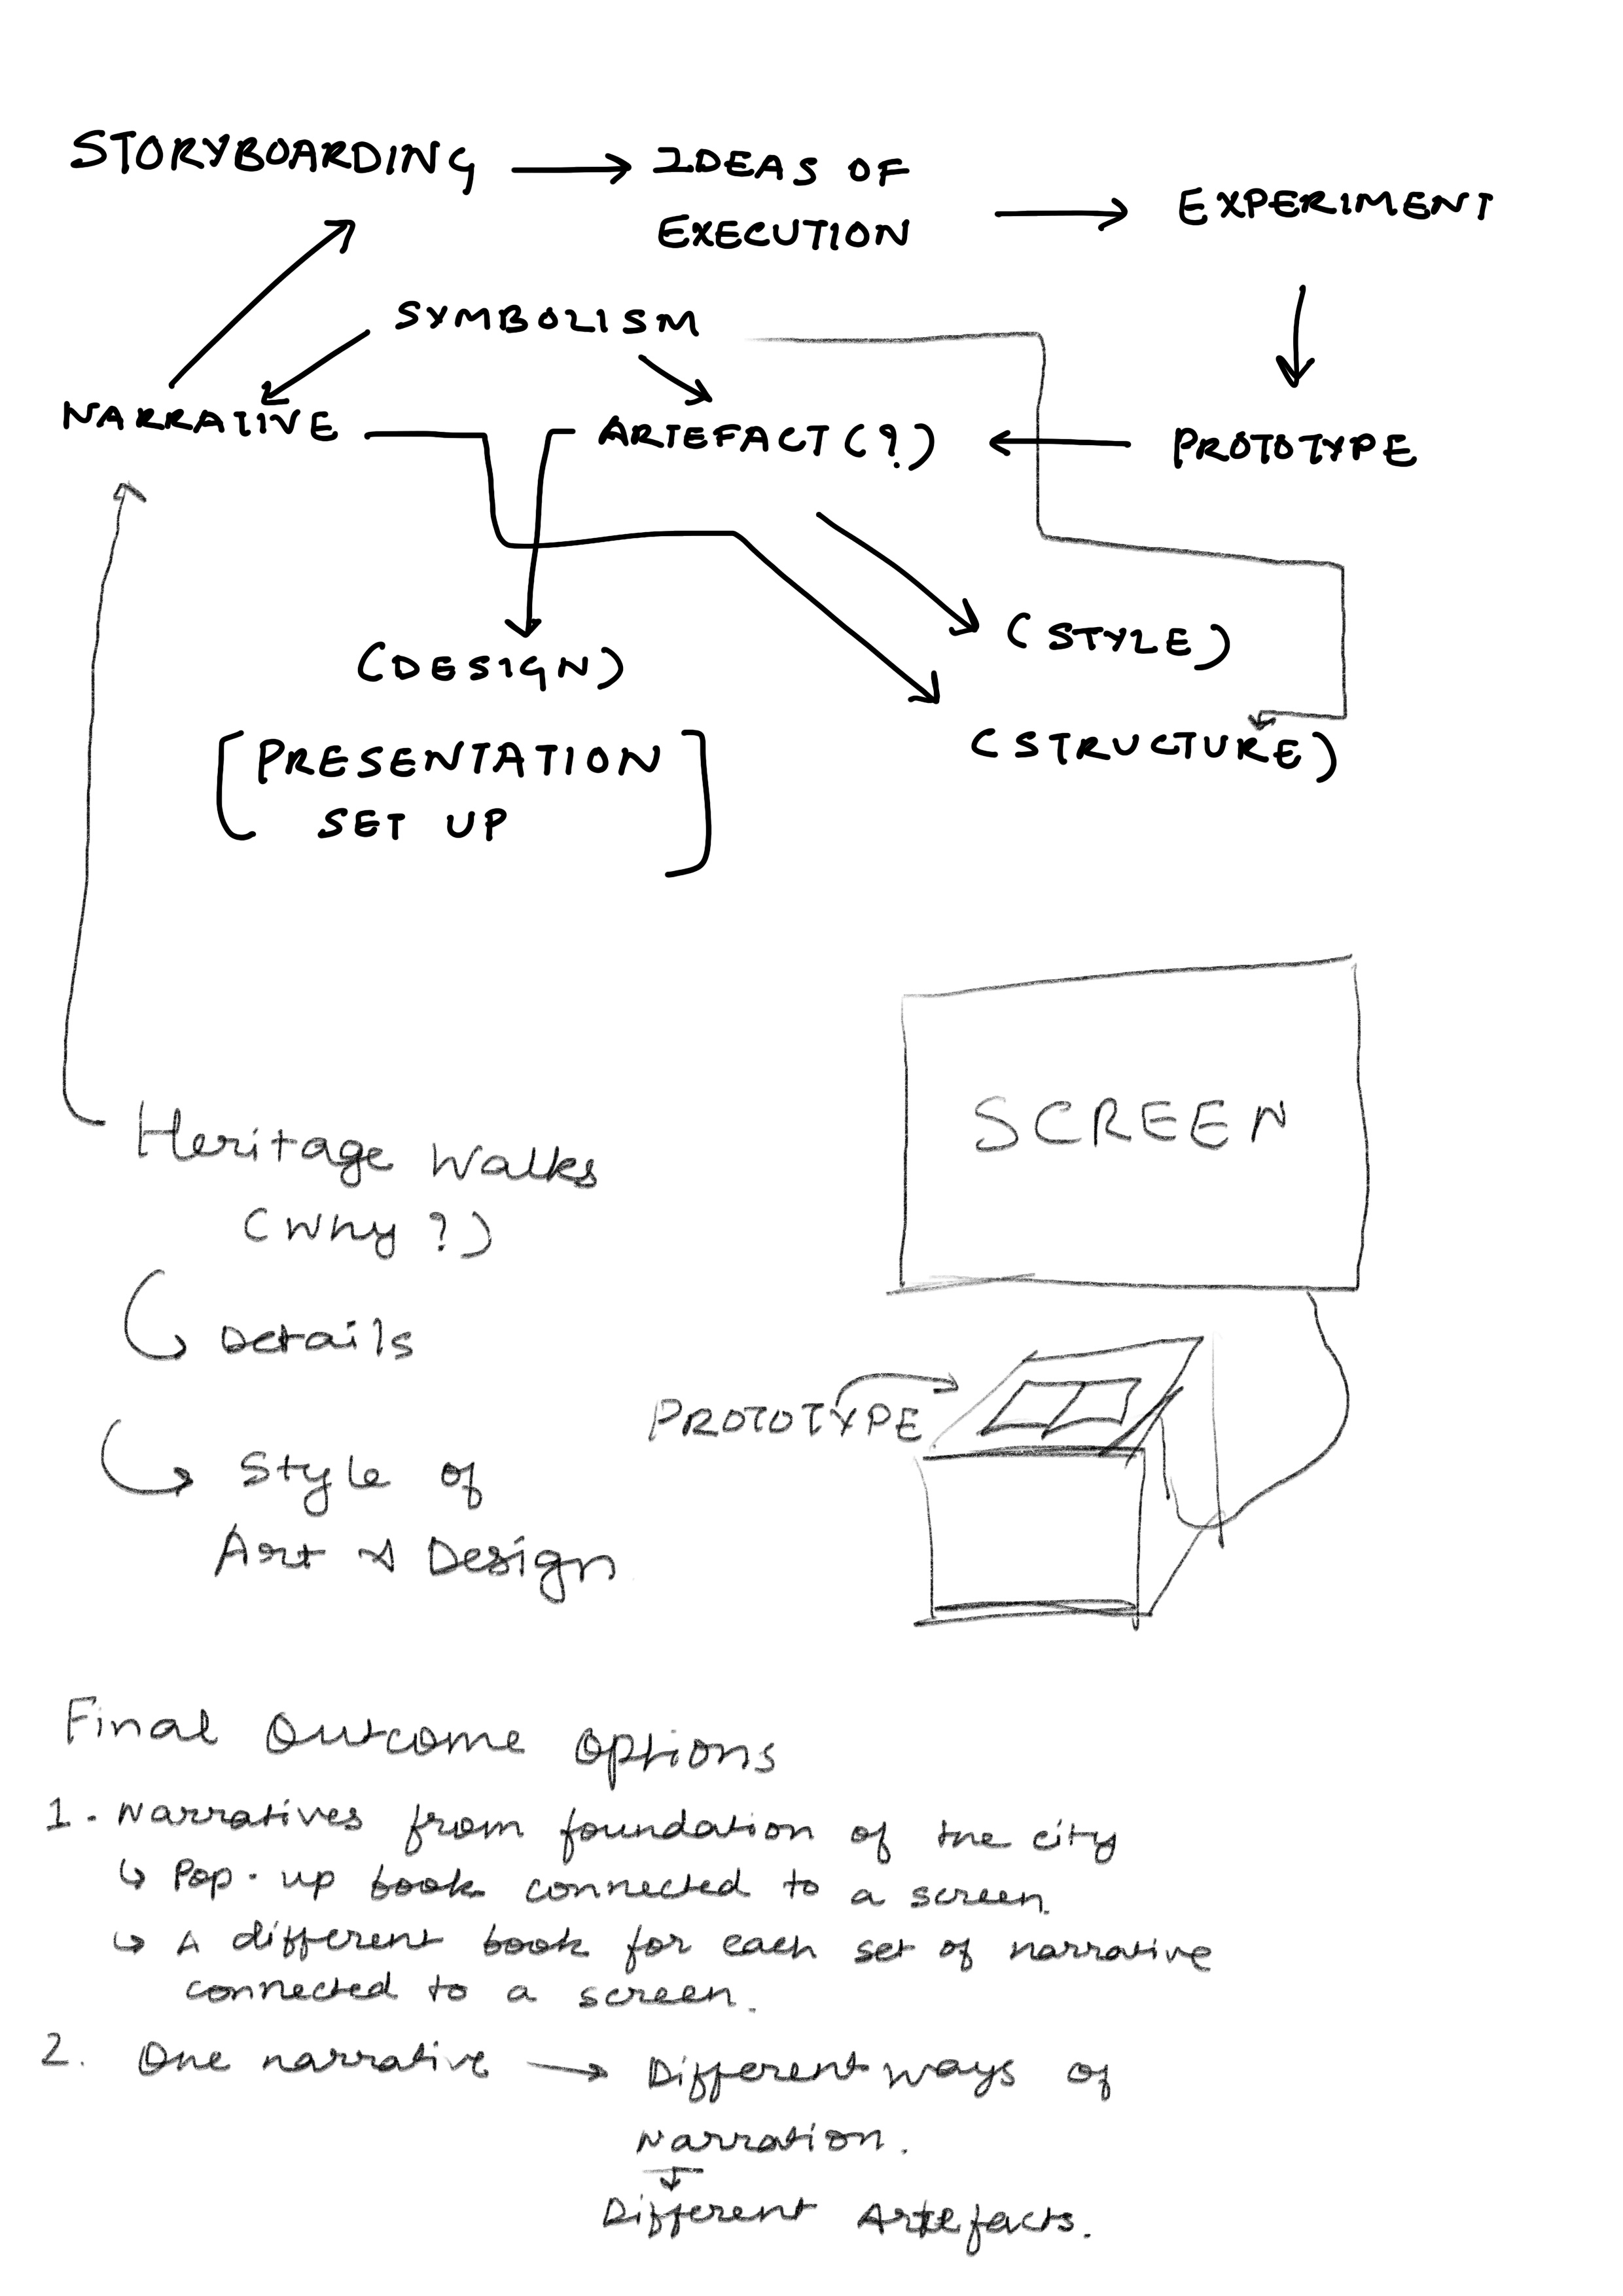
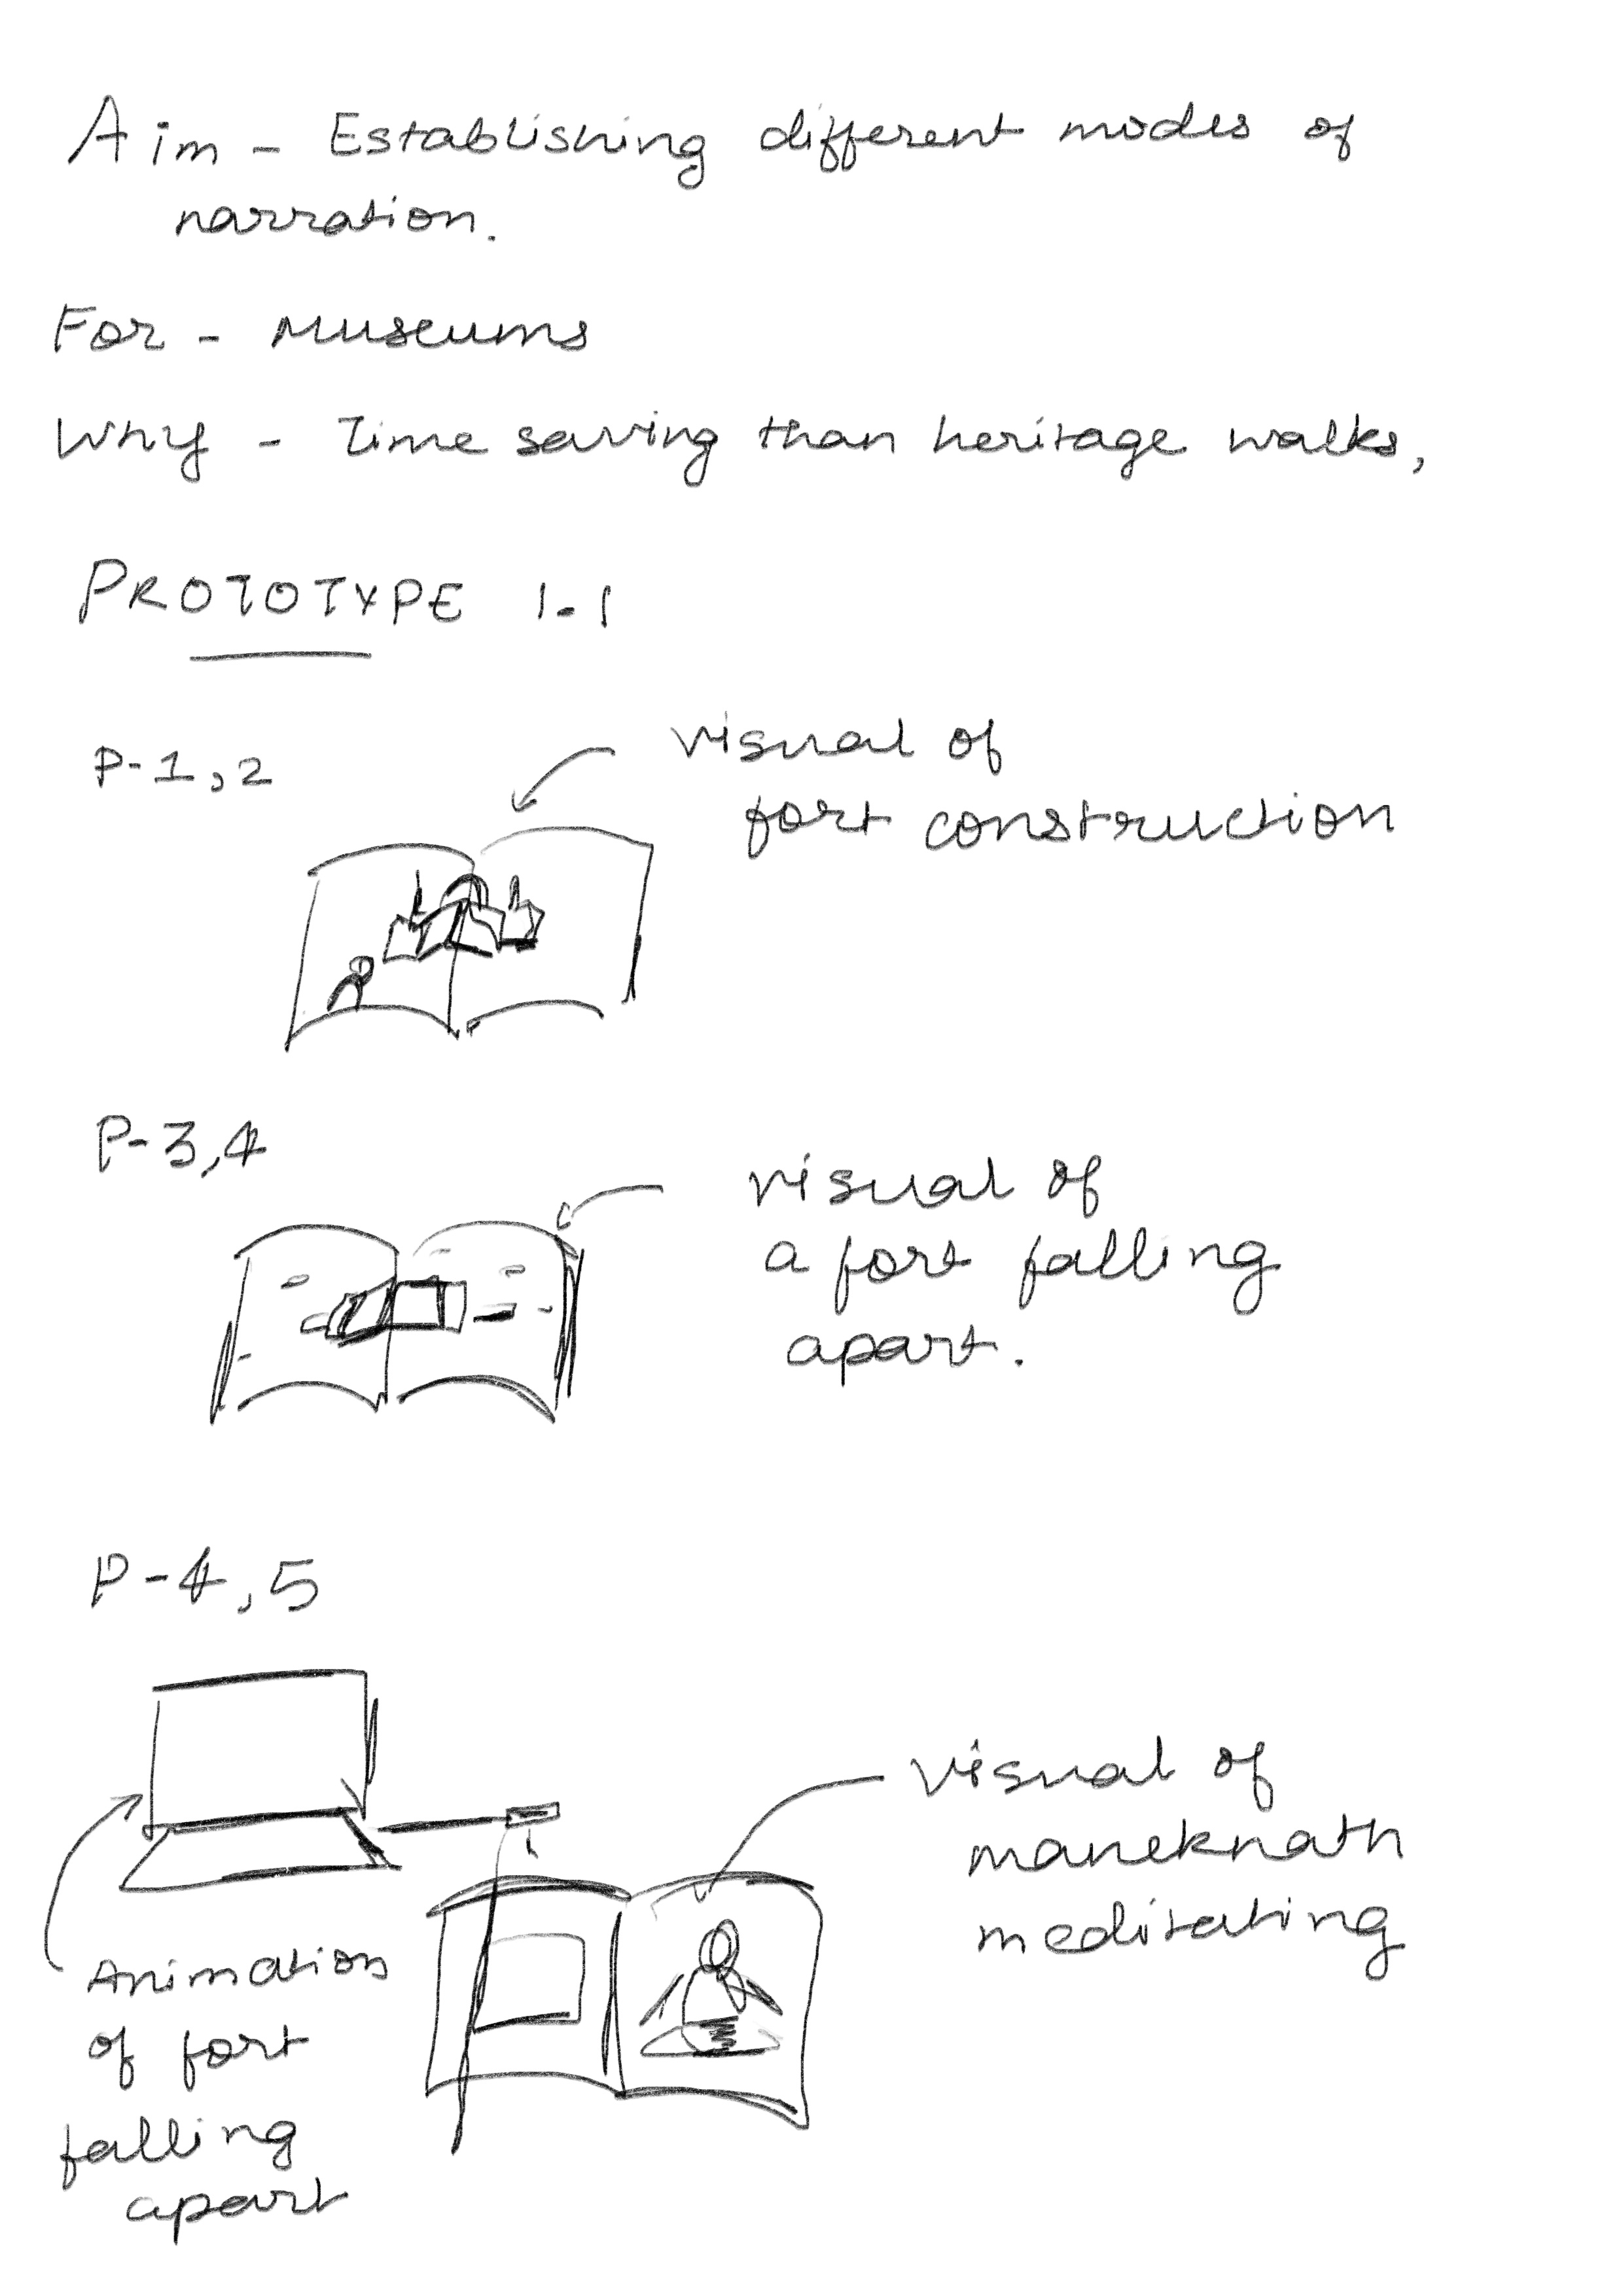
For further I made plans for what I will do for my prototype
I realised that there are a few things that I have to take under consideration like text language. If my artefact is to be a contribution to cultural hertiage I should also think about using the local language as well. Another thing to consider is visual aesthetic - although it is something I can explore when I am back to Ahmedabad in decemeber - because I wanted to use Indian traditional art form in my artefacts. Additionally what I needed to understand was that this wasn't just about the technical part but also about designing the appearance of it, to present it.Also I need to add context in the publication. But I also want to do a visual test so I thought I could provide the context but maybe in a separate publication booklet.
Testing for the final prototype
I was talking to Pragathi about my experiments and prototype and I learned from her that Servo motors don't work as a source of input, but the idea that I want to execute could be done with a potentiometer. So first thing I did was to buy original Arduino UNO board and a potentiometer.
Potentiometer
I first started working with the potentiometer and connected it to the p5js sketch I had made. I used ChatGPT to figure out the coding part. First I worked on the potentiometer.
Enter Servo Motor
So first I had attached the string to the potentiometer so that I can rotate it by puuling the string. And the role of servo meter was to pull the string back once the button was pressed.
Potentiometer Set-up
The potentiometer needed a strong base that can hold it so when a user pulls the string the knob on the potentiometer rotates. At first I was confused but then when I went to the electornics store looking for a potentiometer holder, they suggested that I use a mini-breadboard and then stick it to the table I will set it up on.
I had also decided to remove the servo meter later as tt wasn't working that great with the string. The servo motor wings were not strong enough to pull the string and it was not able to move the potentiometer fully. So I decided to remove the servo motor and just keep the potentiometer.